| |||
|
|
#11 | |
|
We all need something to live for...
Forum Lord Join Date: Jan 2019
Location: Greatness from Small Beginnings
Posts: 1,240
Thanks: 352
Thanked 9,803 Times in 928 Posts
           |
Quote:
 |
|
|
|

|
| The Following 5 Users Say Thank You to MasterBates For This Useful Post: |
|
|
#12 |
|
V.I.P.
 Clinically Insane Join Date: Apr 2017
Location: Gilligan's Island
Posts: 4,795
Thanks: 15,133
Thanked 21,991 Times in 4,460 Posts
           |
Thank you for the kind compliments MasterBates
 and LarryO !  I have been a moderator for many many years in other forums, but at the moment I would rather just be a normal member here and enjoy the good times with good friends  As I said before, I am not an expert at using Photoshop, but over the years I have found some nice tips and tricks to make my life much easier in using this image program. It is easy to use, but you need some time to get familiarized with the diferent "tools" it has, so you know what buttons to press or what "tool" to use in any image you are working on. For a couple of years I had been using diferent types/upgrades of Photoshop but I stopped at version CS5  . . I might in the near future get to install the latest version, just because it now uses and includes some latest A.I. effects plugins, but ALL the special effects plugins I really need have already been installed in the version I am using now, which is CS5 (extended version). Yeah, I know, it is old, but it also does the job for me very easily and quickly. - Photoshop special-effects plugins like "Topaz Labs" , "Eyecandy 4000", "Alien Skin Xenofex 2", "Mike and Yael remove white", are just some of the most important plugins everyone should have in their working Photoshop program. These will make your life so much easier and much more fun to work on any image. They can also fix or add an extra dose of eye-candy to any image or artwork. Simple to use with just one click. But even without these plugins, You can still create many special effects without them, but to be very honest, you will spend over an hour or more just trying to achieve the same effect. Some times making hundreds of layers! So the extra photoshop plugins are a time-saver and it does the same job with just the touch of a button. Other things which are very useful (and time saving) when working on an image are Tons of other FREE goodies. These can be found all over the internet and in such artist resource places like Deviantart. Make yourself a member of Deviantart for FREE so you can see and download ALL the goodies ! You will thank me later. Download ALOT of them and keep them in a safe folder in your PC, or save them into an external 2 Terabyte portable hardrive. Buy an external Hardrive with at least 1 or 2 terabytes, because you will NEED and be using ALOT of these free goodies! I highly recomend buying TOSHIBA or TOURO. Very useful to save good things... I have 18 terabytes now  DO NOT Install all of these goodies into your Photoshop programs, because it will just slow it down if it has too many things installed in the program. Keep it cool and light... You will work faster with the program. It is very easy to install and remove stuff in Photoshop. SO keep this in mind. What other freebies and useful things should I get? Here is a useful list ... - BRUSHES= all types of brushes. Special effects painting, hair brushes, stars and sparkles, and so many many others. These can only be used with your Brush-tools and nothing more. They are very useful. Code:
These links are just a few for you to start downloading ... look into each poster and their other available free resources ! . NEVER PAY for anything when you can get it for Free ! Be wise! ........................................................ Complete Tree Brush Pack http://deviantart.com/horhew/art/Complete-Tree-Brush-Pack-22839764 ............................ Dynamic FUR Brushes for Photoshop *EXTRAS* http://deviantart.com/loonaris/art/Dynamic-FUR-Brushes-for-Photoshop-EXTRAS-492754308 ............................ hair brushes II http://deviantart.com/ivadesign/art/hair-brushes-II-99673734 ............................ Hair texture brush http://deviantart.com/muse-of-stock/art/Hair-texture-brush-589600383 ............................ eyelashes brushes by @ammonis http://deviantart.com/ammonis/art/eyelashes-brushes-by-ammonis-889595161 ............................ Various painting brushes worth using and downloading - http://deviantart.com/aarongriffinart/art/BRUSHES-609357781 - http://deviantart.com/sephiroth-art/art/Sephiroth-Art-BrushSet-656189683 - http://deviantart.com/sakimichan/art/Photoshop-Brushes-343664542 - http://deviantart.com/jonasdero/art/FREE-PHOTOSHOP-GIMP-BRUSHES-Explanation-348274576 - http://deviantart.com/deanoyebo/art/Environment-Brushes-353539623 - http://deviantart.com/deharme/art/Deharme-BRUSHES-Photoshop-CC-435479570 ............................ Photoshop Brushes for Painting Skin http://deviantart.com/pixelstains/art/3-Photoshop-Brushes-for-Painting-Skin-519850130 ............................ Houston Sharp - My Brushes http://deviantart.com/houstonsharp/art/My-Brushes-424639896 ............................ Lightning Brushes http://deviantart.com/frostbo/art/Lightning-Brushes-Photoshop-272581879 ............................ - FONTS = a useful and unique looking font lettering is always useful for any photohop artwork, which needs some type of lettering. These are still available for FREE download from many websites. just write "Free fonts" in Google and you will see hundreds of websites. You will need to spend a few hours browsing them all and downloading stuff but if you use alot of fonts like I do, it is worth it. I usually do not download font-packs, because sometimes they do not have what I really want to use. So I rather spend a little time and browse the websites to collect those fonts which are the ones I really need. Code:
These links are just a start for you to download... Choose your free fonts from MANY styles and designs! . NEVER PAY for anything when you can get it for Free ! ........................................................ http://dafont.com/pt/ http://1001fonts.com/ http://befonts.com/ http://urbanfonts.com/free-fonts.htm http://fontesk.com/ http://deviantart.com/search?q=free+fonts - Font STYLES = Once you got your font lettering installed into photoshop to use, some times you may wish to use some special effects on the lettering. These are called "STYLES". You can also download tons of Free Styles from Deviantart. These can be from 3-D looking styles, to fire and ice looking styles, Gold and Chrome styles to any other imaginable special effects for lettering. Get a few to use on your letters! Code:
These links are just a start for you to download... Choose your free font STYLES from MANY styles and designs! . NEVER PAY for anything when you can get it for Free ! ........................................................ http://deviantart.com/search?q=free+font+styles I also suggest ... BUNDLE - Minimalistic Metal PS Styles http://deviantart.com/koolgfx/art/BUNDLE-30-Minimalistic-Metal-PS-Styles-350003257 http://deviantart.com/koolgfx/art/Minimalistic-Metal-Photoshop-Layer-Styles-301389908 http://deviantart.com/amine5a5/art/layer-styles-90535509 Movies 'n' Games Styles BUNDLE http://deviantart.com/koolgfx/art/Movies-n-Games-Styles-BUNDLE-207341421 80 Free Embossed Photoshop Styles http://deviantart.com/designercow/art/80-Free-Embossed-Photoshop-Styles-315091140 80 Free Photoshop Pressed Styles http://deviantart.com/designercow/art/80-Free-Photoshop-Pressed-Styles-305146690 100+ New Gold Styles http://deviantart.com/designercow/art/Preview-New-Gold-Styles-393017407 Transparent Glass Style for PS http://deviantart.com/petertwl/art/Transparent-Glass-Style-for-PS-49968843 - ACTIONS = These are special effects already-made to be used on any image. It will save you countless hours with just a click of the button. They will automaticly rework your image to have any special effects without damaging your original image. All the effects layers will be added automaticly on top of your image. You can either leave them as they are if you like what you see, or go into the action folder and play around with the layers to add, or remove, or to tweak the effects to your pleasure. Get tons of effects "Actions" from Deviantart" also. Code:
These links are just a start for you to download...
Choose your free Photoshop ACTIONS !

NEVER PAY for anything when you can get it for Free !
........................................................

http://deviantart.com/search?q=photoshop+actions


Some suggestions from me for you...

50 Photoshop Postwork Actions
http://deviantart.com/mauricioestrella/art/50-Photoshop-Postwork-Actions-65223059
........................................................
If you can get to download ALL of this girl´s PSD-Actions you are in heaven!
She used to go by the name... lieveheersbeestje
http://deviantart.com/meganjoy/gallery/34574995/photoshop-actions
........................................................
w1zzy-resources
http://deviantart.com/w1zzy-resources/gallery
........................................................
Ghost Stories Photoshop Action
http://deviantart.com/elestrial/art/Ghost-Stories-Photoshop-Action-192944578
........................................................
Toasted Photoshop Actions
http://deviantart.com/elestrial/art/Toasted-Photoshop-Actions-193104331
.......................................................
Look around for alot more ACTION freebies
__________________
Last edited by maxhitman; 3rd November 2022 at 04:09.
Reason: fix
 |
|
|

|
| The Following 5 Users Say Thank You to maxhitman For This Useful Post: |
|
|
#13 |
|
V.I.P.
 Clinically Insane Join Date: Apr 2017
Location: Gilligan's Island
Posts: 4,795
Thanks: 15,133
Thanked 21,991 Times in 4,460 Posts
           |
...Continued from last post ...
- PSD Colors = Often called "PSDs" . These are almost like "actions" but much more simpler. They usually change the coloring of your image or it can also add a touch of special effects to your image. PSD-Colors can also be very useful (and easy to make for yourself ) to be used on many of your artworks. These are usually used AFTER the image has been totally re-worked and you think it is finished. By adding a little splash of effects coloring from a PSD-Color it can make your image "pop" and look even better. These can be very useful, so download alot from Deviantart for FREE. TIP = Best way to use these on your art is to open both files in view in your photoshop screen --> Your art AND the opened "PSD-Color" image FOLDER. Go to the PSD-Colors folder and drag-and-drop its folder into your image art on the TOP LAYER. Very easy to do. You will then be able to fix and tweak the colors much quicker and easier  Another Tip = In your computer make a new folder for each individual downloaded PSDs and save it along with an image (Jpeg) of the color effects it will create. So you will KNOW later on what it can do. Code:
Even though there are TONS of FREE PSD-Colorings in Deviantart I am only going to suggest TWO links to them, ---------> DOWNLOAD THEM ALL !... Everything you see. http://deviantart.com/theoutlandish/gallery/56249625/psds http://deviantart.com/ravenorlov/gallery/38563957/psds - Image Cut-Out Resources = These are simple image cut-outs and saved as a PNG file. By saving cut-out images in PNG you will always have a transparent background and a ready to be used image resource for any image you are working on. You can either make them yourself by slowly cuting out a picture to be used, or search around Deviantart, or the internet for tons of FREE "PNG CUT-OUTS". - TEXTURES = These are simple looking images/pictures but you can add them to your art for creating special effects on top of your art. It gives the image that extra boost of eye-candy and special effects . These do not come with your plugins such as "Actions" or " PSD-Colors", so you will need to find and download these resources from the internet or from Deviantart. You can choose from a Grunge-style texture, to a canvas texture, crumpled paper textures, dirt, gravel, rock, photo light-leaks, dust, fog, smoke, clouds, sparkles, stars, Bokeh lights, Fire, water, sand, sun-rays, mud and so many other texture effects. SOME images may look simple and some times may even look UGLY, but once used on top of your art and you turn the textures layer to be "lighten", or "screen", or "overlay", "soft-light" or "Hard-light" the image will then blend into your art and give it a special visual effect ! You will be very happy to be using "textures" alot. Download many , download a thousand ! It is best to download image "textures" in a large size format - so they can be used with large sized artworks. For those people that do ALOT of video-game skins using Photoshop, these "textures" are a MUST-HAVE to be used with your skin-art. Just to give you an idea, the first TOMB-RAIDER 1 game had game skins the size of 512x512 pixels  LOL LOL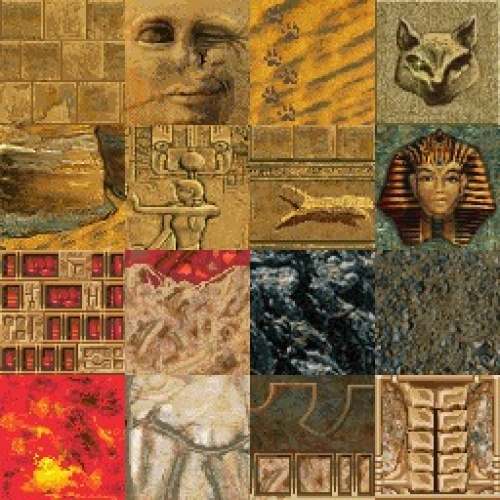 ... in todays games the normal skins are sized at around 1024x1024 pixels or 2048x2048 pixels or even bigger. Each skin is just for ONE 3D-object... Now imagine how many skins needed to fill up an entire game and all its 3-D objects ? This was the exact size of some of the game skins I did (1024x1024) Fokker D.VII for combat Flight-Sim IL2-1946+Mods 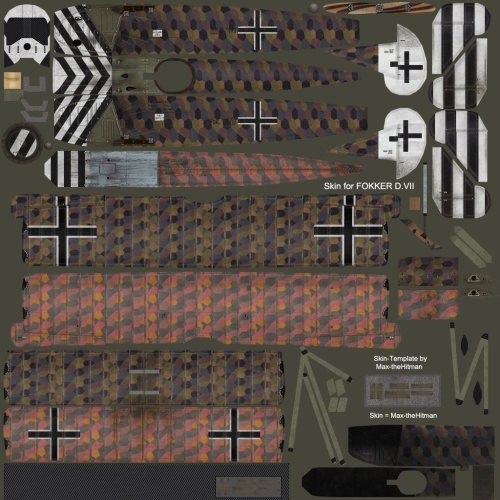 - F-14D -"Maverick - TOP GUN" Film for combat Flight-Sim IL2-1946+Mods 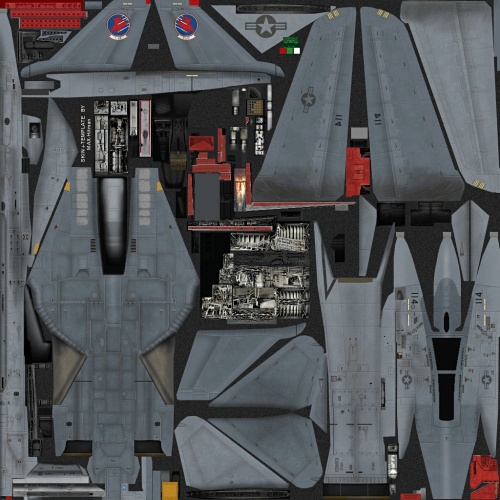
__________________
Last edited by maxhitman; 3rd November 2022 at 04:23.
Reason: fix
 |
|
|

|
| The Following 5 Users Say Thank You to maxhitman For This Useful Post: |
|
|
#14 |
|
CylnZscrmZ, a.b.n.c.f
 Addicted Join Date: Oct 2013
Posts: 697
Thanks: 3,853
Thanked 4,246 Times in 675 Posts
           |
for textures, I use pexels.com
I havent used photoshop since cs3, I use Gimp. (it's free, you can chat with the devs, there's a huge user base, but mostly I hate the subscxription shilling cocksuckers named adobe. Layers are your friends. channels are good too, but paths are the greatest. I use a lot of paths as selections in layer modes to do all kinds of fun stuff. Sadly, I'm horrible at doing tutorials. sorry. here's a link to see what Im talking about in the tut below : http://veterperementour.ru/showpost.p...&postcount=149 Here's a short short tut on a process I made up for fixing the stupid yellow or pumkpin filters people use on pics. I use Gimp 2.10 in linux. 1. open the image you want to work on 2. ctrl+shft+s to save a new file 3. cruise to your ART folder 4. make a new folder for the image youre working on (I use the actress' name as a folder, then make a new subfolder under her name with a project title) I learned to do this so i could later find the damned things 5. save your base *.psd or *.xcf (gimp) with your choice of name and a 01 at the end. (Dont worry, you wont have just 1) 6. back in our graphics proggy, right click on your layer in the layer list. ADD an alpha channel (some already have one, some dont. YOU ALWAYS WANT 1) 7. now that we have our original image as a base layer, right click on it in the layer list and choose 'duplicate layer" now there are 2 + a background layer we dont a shit about 8. in the layer list is a check or an x or an eyeball (depends on your theming) this turns on or off a layers visibility. (you'll eventually fuckin LOVE this little ditty because it lets you save layers in case you fuck up or want to keep a certain effect for later while working on your base idea / workflow 9. now that we have our 2 layers, select the clone and go up to colors on your toolbar 10 go down to desaturate choose desaturate and scroll thru the desaturate modes to "luminance" 11. go ahead and apply the desaturate You should now have a black n white version of your original pic  But WAIT! remember you have 2 copies of your pic as layers, right? awesome! Now you get to learn about LAYER MODES look over to the right and find your layer list. got it? 12. look at the top of the list it says "mode" with a list box under it. scroll down the list box till you get to "screen" got it? 13. Spiffy, now look under that box for layer "opacity" mine's a drag bar under the mode list box. 14. adjust that drag bar while watching your image, you'll go from really bright and almost black n white down to your stupidly over saturated original layer. 15. just run thru and adjust the opacity of the black n white layer till you like the look. I'm usually around 40-50% opacity in mine. There are some issues that take some working our, like blues get wasted. as in gone. the desaturated layer is great for skin and general toning down, but you lose the cooler side of your palette. this can be fixed by only changing the colors you want and leaving the back grounds alone or changing them much less. (thats a whole nother lesson about selections, paths, and masks) 16 now that we have a nice look (or at least the great pumpkin hasnt bitchslapped your pick into dayglow orange land) go up to your top bar and find 'layer" it's a drop down menu. 17. chosse "new layer from visible" waBAM! you now have a layer that has the exact look of your workflow in one new layer. rinse and repeat all this on different parts of your pic till youre sick of it, have a beer and start over. In a few years you'll be the envy of 4 or 5 total strangers on the interwebs  (keep in mind, many of my pics have 80-100 layers and I'lll have saved 15-20 different file versions as i go along.)
__________________
Last edited by cylnz; 3rd November 2022 at 04:39.
|
|
|

|
| The Following 5 Users Say Thank You to cylnz For This Useful Post: |
|
|
#15 |
|
CylnZscrmZ, a.b.n.c.f
 Addicted Join Date: Oct 2013
Posts: 697
Thanks: 3,853
Thanked 4,246 Times in 675 Posts
           |
Guess I should have asked before butting in with a post, sorry bout that OP
__________________
|
|
|

|
| The Following 5 Users Say Thank You to cylnz For This Useful Post: |
|
|
#16 |
|
V.I.P.
 Clinically Insane Join Date: Apr 2017
Location: Gilligan's Island
Posts: 4,795
Thanks: 15,133
Thanked 21,991 Times in 4,460 Posts
           |
Its no problem Cylnz
 You are a very cool artist. You are a very cool artist. I have seen your art. You should post more often ! You can post here your Tips & Tricks and cool Tutorials. We are always learning new stuff  Cheers
__________________
 |
|
|

|
| The Following 5 Users Say Thank You to maxhitman For This Useful Post: |
|
|
#17 |
|
Sorceress
 Beyond Redemption Join Date: May 2008
Location: Where the Wild Things Are
Posts: 13,293
Thanks: 112,414
Thanked 109,665 Times in 11,756 Posts
           |
Very nice of all of you to do  .
__________________
  |
|
|

|
| The Following 4 Users Say Thank You to wildwest08 For This Useful Post: |
|
|
#18 |
|
We all need something to live for...
Forum Lord Join Date: Jan 2019
Location: Greatness from Small Beginnings
Posts: 1,240
Thanks: 352
Thanked 9,803 Times in 928 Posts
           |
i couldnt use the actions they didnt do much for me but the PSDs did; what I need is a stack of them to use on modeling pics I pick up here and there...alot of them have quality issues and have a color deficiency, so I try and add color/vibrance/clarity to them and it works but finding PSDs to help give a pop to the colors of an insta bikini model or models I find here would help alot! kinda give them a HQ look also everything looks too yellowish for whatever reason so anti yellowing masks would help as well
|
|
|

|
| The Following 3 Users Say Thank You to MasterBates For This Useful Post: |
|
|
#19 |
|
CylnZscrmZ, a.b.n.c.f
 Addicted Join Date: Oct 2013
Posts: 697
Thanks: 3,853
Thanked 4,246 Times in 675 Posts
           |
PSD it's just the file extension for native Photoshop files. Like XLS is for Excel.
I think when you are asking for a r e color pallet files. http://sk1project.net/palettes/
__________________
|
|
|

|
| The Following 3 Users Say Thank You to cylnz For This Useful Post: |
|
|
#20 | |
|
V.I.P.
 Clinically Insane Join Date: Apr 2017
Location: Gilligan's Island
Posts: 4,795
Thanks: 15,133
Thanked 21,991 Times in 4,460 Posts
           |
Quote:
 Depending on which PSDs you discover and use, they can either make, or break, an image. It is all a matter of taking the time and experiment them on a photo. Some of them make wonders for sexy girl photos. One important thing which I did not talk about, is calibrating your PC monitor. It is very important that you get the proper color tones in your montor to work on any image. I will leave these 2 images... download them and test your monitor. 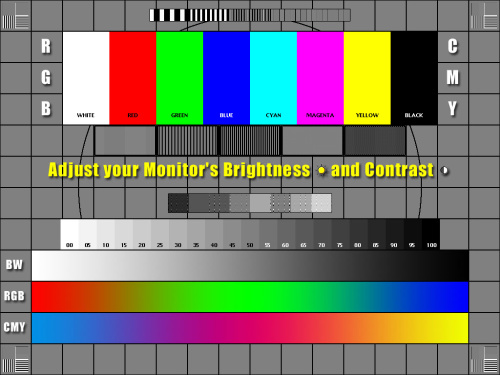 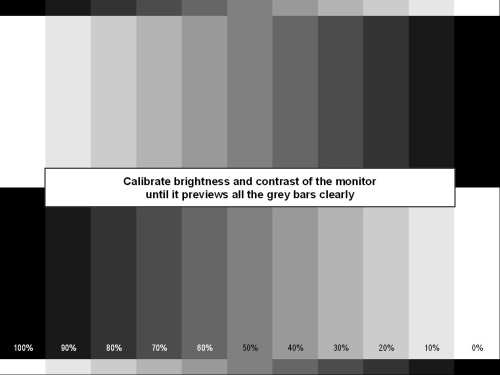 Once you do this, then go to your Photoshop and get it to work properly with the colors. Go to > IMAGE > select MODE > select RGB color > most images will open with 8bits/channel so you can leave at that. - Take note ==> When you open up ANY image you saved and open it with Photoshop, make sure to look at this "mode" setting FIRST and if the image is in "RGB color", BEFORE you start working on it. Some pople some times save their images on the internet in another format and when you try to work on them, you will just get color errors and other strange stuff. Next look at your color settings in... Go to > Edit > Color Settings > in the settings Pop-Window you will see " North America General Purpose 2". I found that working with this setting makes my images look great on any other monitor and on the internet. Once you do this to your Photoshop program - you will be set properly to work on any image. Otherwise, you might be doing a mistake. This happened to me many years ago when I was just starting out using Photoshop. Some of my images looked good on my PC monitor, but when I looked at them in other people´s monitors ,or on the internet, there was clearly something terribly bad with my settings. My settings were wrong. So when you work with "PSDs" you will be working with alot of color changes, in tones, hues, darks and highlights, and so on. So it is best, you prepare your pc monitor and your working canvas in Photoshop to work its best for you.  I have around 1,600 PSDs (about 2,20 GB) and I sometimes use them for a little splash of color, or for just an artsy look to my images. It all depends on the image and what you want it to look like. Also keep in mind that some images, actually do not need any color changes or fancy special-effects. I guess, it all depends on your taste and your artistic creativity. But I always suggest to experiment ALOT. Do ALOT of crazy stuff to your photos, so you can test and create new things. That is the only way you are going to learn. Trial and error is the best way to learn and adapt, and next time you will know exactly what to do or fix a problem. We have all been there and have done alot of errors in the past. It is never going to come out a masterpiece artwork from the first time. Art like all things, take time. ----------------------------------------------------------------------- Another tip... When saving Photoshop images for yourself, make sure you try to save them in 3 or 4 formats. - ONE is save them as PSD format files. This will keep and save ALL your separated layers as you worked on the image. - 2 is save them in PNG format, which will be slightly heavy in size but will save the images in great color as the original, and also for printing if you which. (for professional printing is a totally diferent tutorial and done a diferent way when you save images) - 3 is save them in JPEG format for posting on the internet or for sharing images with friends. The Jpeg is slightly lower in pixels weight and size but still saves images to look nice. This is what everyone has been doing for years on the internet. AND - 4 ... there is another Jpeg mode which is "Save for Web" format, which some forum administrators sometimes ask artists to save their images in. These are less heavy Jpegs, but still saving your images to look good. example... In large sized wallpapers I usually save them as "save for web", and you still get to see wonderful colors and details, but they are less "heavy" than normal Jpegs. LOOK AT THIS... to save in any other format you want, you usually go to > FILE > Save As... and then select which type FORMAT you want, just by scrolling the list available in image formats. But for "SAVE FOR WEB" you go to > FILE > Save for Web and Devices... in the Pop-up-window you will select HIGH or VERY HIGH, no need to select Progressive, Optimized or whatever (leave unchecked), but you decide on that, Check the box ... convert to sRGB... Monitor color ... Metadata NONE. and just save and place it in your computer files/folder. Make sure to also write on the saved image name at the end "_WEB" so you will later know that this image is in "save for Web" format and will be much diferent from your other saved image formats.  Also keep in mind to NOT USE any strange or less common letters (or characters) on your images. What I mean is, just give the image a name and just use these TWO symbols "_" or "-" on them. The reason is, that if you start using all types of commas, dots, slashes, and stuff, you may encounter problems later on when you try to upload your images to a server/forum/game or some where else. Example... DO name your images " Planetsuzy" or "Planet_suzy" or "Planet-suzy" ...if I save the image in format "save for web", I write "planetsuzy_web" Do NOT write "planet/suzy" or "planet,suzy" or "planet#suzy" or "Planet&suzy" or "Planet$suzy" or "Planet=susy", and so on. To some people it may seem normal to write anything in any way you may wish, but the truth is, it might give you problems later on with servers or even in your own hardrives. Another example is that some video-games don´t even accept game skins with strange characters written on their skins! So KEEP it simple and easy and everything will be alright 
__________________
Last edited by maxhitman; 6th November 2022 at 03:43.
Reason: fix
 |
|
|
|

|
| The Following 5 Users Say Thank You to maxhitman For This Useful Post: |
 |
| Thread Tools | |
|
|